How to transfer a domain name: A Clear, Fast Guide
- Baslon Digital

- Jan 14
- 16 min read
Updated: Jan 19
Transferring a domain name might sound a bit technical, but it's really about getting a few key things in order first. You need to unlock it, make sure your contact info is up to date, and grab an authorisation code from your current registrar. With that code in hand, you can kick off the transfer with your new provider, who will handle the rest.
Your Essential Pre-Transfer Checklist
Thinking about how to transfer a domain name can feel a bit daunting, but honestly, success is all in the prep work. Before you even start looking at your new registrar's dashboard, there are a few non-negotiable steps to take. Nailing these turns what could be a headache into a smooth, straightforward process.
Think of this checklist as your safety net. I've seen it time and time again—skipping these foundational tasks is the number one reason transfers fail or get stuck in a frustrating limbo. Let's walk through exactly what you need to do at your current registrar to set yourself up for a flawless move.
Unlock Your Domain for Transfer
By default, most domain registrars put a registrar lock on your domain. This isn't them being difficult; it's a critical security feature to stop someone from stealing your domain through an unauthorised transfer.
Before you can start the move, you need to manually switch this lock off. It’s usually a simple toggle or button in your domain management area, often called "Domain Lock" or "Transfer Lock." Flipping this switch is your way of telling the global domain registry that you've approved the move.
Verify Your WHOIS and Administrative Email
This step is absolutely critical, so don't skip it. Every important email about the transfer, including the final link you need to click to approve it, gets sent to the administrative email address listed in your domain's WHOIS record. If that email is old, or worse, one you can't access, the transfer will fail. Simple as that.
Take a minute to log in to your current registrar and double-check your contact details.
Administrative Contact: Is the email address one you use and check every day?
Registrant Contact: Does this accurately show the legal owner of the domain?
Privacy Settings: You'll likely need to temporarily turn off any domain privacy or WHOIS protection. Some registrars insist on this so the new provider can verify your ownership details.
For businesses wanting an extra layer of security over who can make these kinds of critical changes, many are now implementing a robust Privileged Access Management (PAM) system. This helps control and monitor who has access to sensitive accounts like your domain registrar, stopping unauthorised tweaks in their tracks.
This little graphic breaks down the core prep steps perfectly.
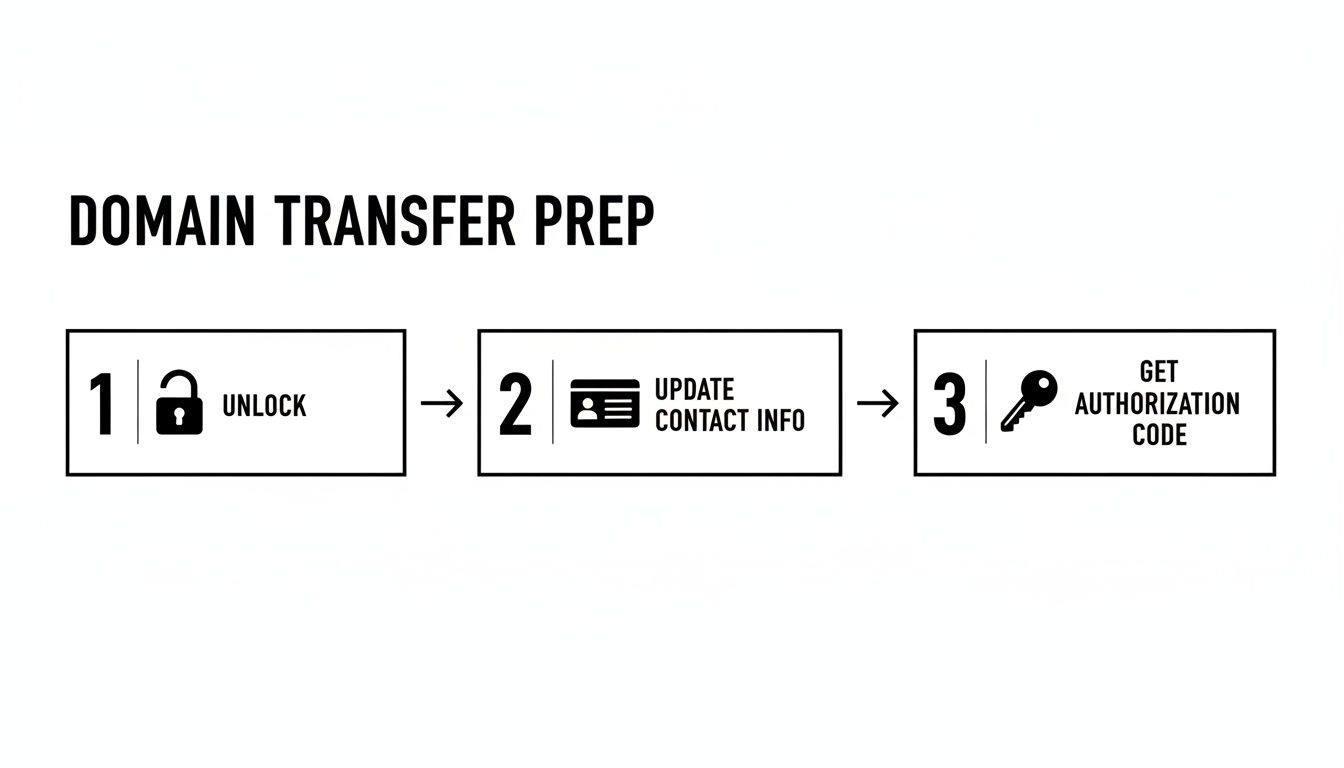
It just goes to show that getting your domain ready is a straightforward, three-part process that puts you firmly in control before the transfer even kicks off.
Secure Your Authorisation Code
The Extensible Provisioning Protocol (EPP) code—also known as an auth code or transfer key—is basically the password for your domain. It's a unique string of letters and numbers that proves you have the right to move the domain to a new home.
You'll find the option to request this code in your current registrar's domain settings, usually somewhere near the domain lock feature. Once you ask for it, it’s typically shown on-screen or emailed to your administrative address. Copy this code and keep it safe; you'll need to hand it over to your new registrar when you start the process with them.
Key Takeaway: The EPP code is the single most important piece of information for a domain transfer. Treat it like a password. Only give it to your new, chosen registrar when they ask for it.
Check the 60-Day Transfer Lock Rule
Finally, a heads-up about a rule from ICANN, the organisation that governs domains. You cannot transfer a domain within 60 days of first registering it or after a previous transfer. On top of that, some registrars will slap on a similar 60-day lock if you've recently changed the registrant's contact info.
Check your domain's registration and last transfer dates to make sure it's eligible. Trying to move a domain inside this 60-day window is a surefire way to get an immediate rejection, which is just a frustrating false start. If you've just snapped up a domain, perhaps after learning how to get a free website domain, you'll have to be patient and wait for this period to pass.
Kicking Off the Transfer to Your New Registrar
With all your ducks in a row, you’re ready for the main event: actually starting the transfer with your new registrar. The good news is, this part is surprisingly straightforward. You’ve done all the hard prep work, so think of this as simply handing over the keys to a new property manager.
Your first move will be to find the "Transfer a Domain" or "Move a Domain" section on your new registrar's website. They’ll ask you to pop in the domain name you want to move. Once you do, their system will run a quick check to make sure it's unlocked and ready to go, confirming all the groundwork you just laid.
Buying the Transfer and Using Your Code
Next up, you'll need to purchase the transfer itself. This usually includes a one-year extension of your domain registration, which gets tacked onto its current expiry date. So, if your domain has six months left, it will have 18 months of registration after a successful transfer. You won't lose any time you've already paid for, which is a common worry.
During the checkout process, you'll be asked for that crucial piece of information you secured earlier: the EPP code, sometimes called an authorisation code. This is where you'll paste that unique string of characters.
A Word of Warning: Be ridiculously careful when entering your EPP code. A single typo is the number one reason for an initial transfer rejection. My advice? Copy and paste it directly to avoid any drama, and give it a quick once-over for extra spaces before you hit submit.
Once you submit the code, the process officially begins. Your new registrar uses it to send a formal request to the central domain registry, which in turn pokes your old registrar to let them know a move is afoot.
This whole process is part of a massive, active market. The global domain registration scene is always growing, impacting how UK businesses manage their online presence. To give you some perspective, by the end of Q3 2025, global domain name registrations hit a staggering 378.5 million across all top-level domains. Specifically, country-code TLDs like reached 142.9 million registrations by Q1 2025, proving they're still vital for local branding. And while and domains are still king, the new generic TLDs are the fastest-growing bunch, up 13.5% year-over-year. It just shows how dynamic the market is and why picking the right registrar matters. You can discover more insights about these domain industry trends on DNIB.com.
A Real-World Example: Transferring a Domain to Wix
A lot of businesses move their domain to consolidate everything with their website builder, and Wix is a massively popular choice. Their process is a perfect example of how this works in the real world.
First, you'd head over to the 'Domains' section in your Wix account dashboard and select the option to transfer a domain you already own.
As you can see, the interface is designed to be crystal clear, guiding you to enter your domain name to kick off the automated checks. After that, it’ll prompt you for your authorisation code to finalise the request, just like any other registrar would.
Choosing a Registrar That Actually Works for You
Kicking off the transfer is also your last chance to be absolutely sure you've picked the right new home for your domain. Price is a big deal, of course, but it shouldn't be the only thing you look at.
Think about these key elements:
Support Quality: Can you actually get hold of a human if things go sideways? Look for live chat, phone support, and what people are saying about their helpdesk in reviews.
Price Transparency: Is the transfer fee clear? More importantly, what’s the annual renewal cost? Some registrars lure you in with a cheap transfer only to sting you with much higher renewal fees later on.
User Experience: Is the control panel easy to figure out? A confusing interface can turn managing your DNS settings or email forwarding into a genuine nightmare down the line.
Taking a minute to weigh these factors ensures your new domain registrar will be a good long-term partner for your business, not just a temporary stop.
Now that you've kicked off the transfer, the process moves into the approval phase. If you're ready to get started with a platform that combines powerful website design with easy domain management, our team at Baslon Digital is here to help. Contact us today to see how we can streamline your online presence.
Navigating the Approval and Verification Process
Right, you’ve started the transfer. Now comes the part where things often grind to a halt: the verification and approval stage. It's not complicated, but it does rely on you acting quickly. Think of it as a two-part digital handshake between your old and new registrars, and you’re the one who has to give the final nod.
The whole system is built for security, which is great because it stops anyone from nicking your domain. But it also means you need to be on the ball and keep a close eye on your inbox—specifically, the admin email address you double-checked earlier.
The First Handshake: The Losing Registrar’s Email
Almost as soon as you hit "submit" on the transfer, your old registrar is going to email you. This is their last-ditch check to make sure you really want to leave them. Inside that email, there will be a link you absolutely have to click to approve the domain's release.
Ignoring this email is the number one reason transfers get delayed. If you don't click that approval link, the registrar usually just lets the clock run down, which can take a full 5 to 7 days before they automatically release the domain. A simple click can slash that waiting time.
A few things you need to do immediately:
Check straight away: Start looking for this email within the first hour.
Dig through your spam folder: These automated emails have a nasty habit of getting lost in spam. Search for things like "domain transfer," "transfer approval," or just your domain name.
Act fast: Clicking that approval link is the single best thing you can do to speed the whole thing up.
That one click basically tells your old registrar, "Yep, I'm out of here," and they can set your domain free, often within hours instead of days.
The Second Handshake: Your New Registrar's Confirmation
While you're waiting for that first email, your new registrar will probably send you one too. This one's a bit different. It’s less of an "action required" and more of a "we've got your request" confirmation, letting you know the wheels are in motion on their end.
This email is your proof that everything is ticking along as it should. It might also give you a link to a status page where you can track the transfer's progress, which is handy for peace of mind.
A domain transfer is basically a conversation between two registrars, but you're the moderator. Your quick approval via email is what keeps the chat moving and stops everything from stalling.
By actively managing these two emails, you're the one in control of the timeline. A process that’s officially quoted to take up to a week can often be done and dusted in an afternoon if you're quick off the mark.
Once you’ve sorted these approvals, the technical handover kicks off. If you'd rather an expert handle this from start to finish, the team at Baslon Digital is ready to help. Get in touch with us for a completely seamless and stress-free domain transfer.
How to Avoid Website and Email Downtime
The single biggest fear when you transfer a domain is that your website will vanish or your emails will just stop arriving. It’s a totally valid concern, but with a bit of planning, it’s also completely avoidable.
The secret to a zero-downtime transfer isn't magic; it's just about understanding the difference between your domain and your DNS settings. Think of your domain as the address on your building, while your DNS (Domain Name System) records are the GPS coordinates that tell everyone exactly how to find your front door.
During the transfer, the address (your domain) moves to a new landlord (your new registrar). Your goal is to make sure the GPS coordinates keep pointing to the right place until the move is 100% complete.
The Golden Rule: Do Not Change Your Nameservers
This is the most important piece of advice in this entire guide. Do not, under any circumstances, change your nameservers at your old registrar while the transfer is in progress. Seriously, don't touch them.
Your nameservers are what connect your domain name to your specific set of DNS records. Changing them too early is like telling the post office you've moved house before you’ve even packed the boxes. Mail will get lost, and visitors won't find you.
By leaving your nameservers untouched, your current DNS settings will continue to direct traffic to your website and email without a single interruption for the entire 5-7 day transfer window.
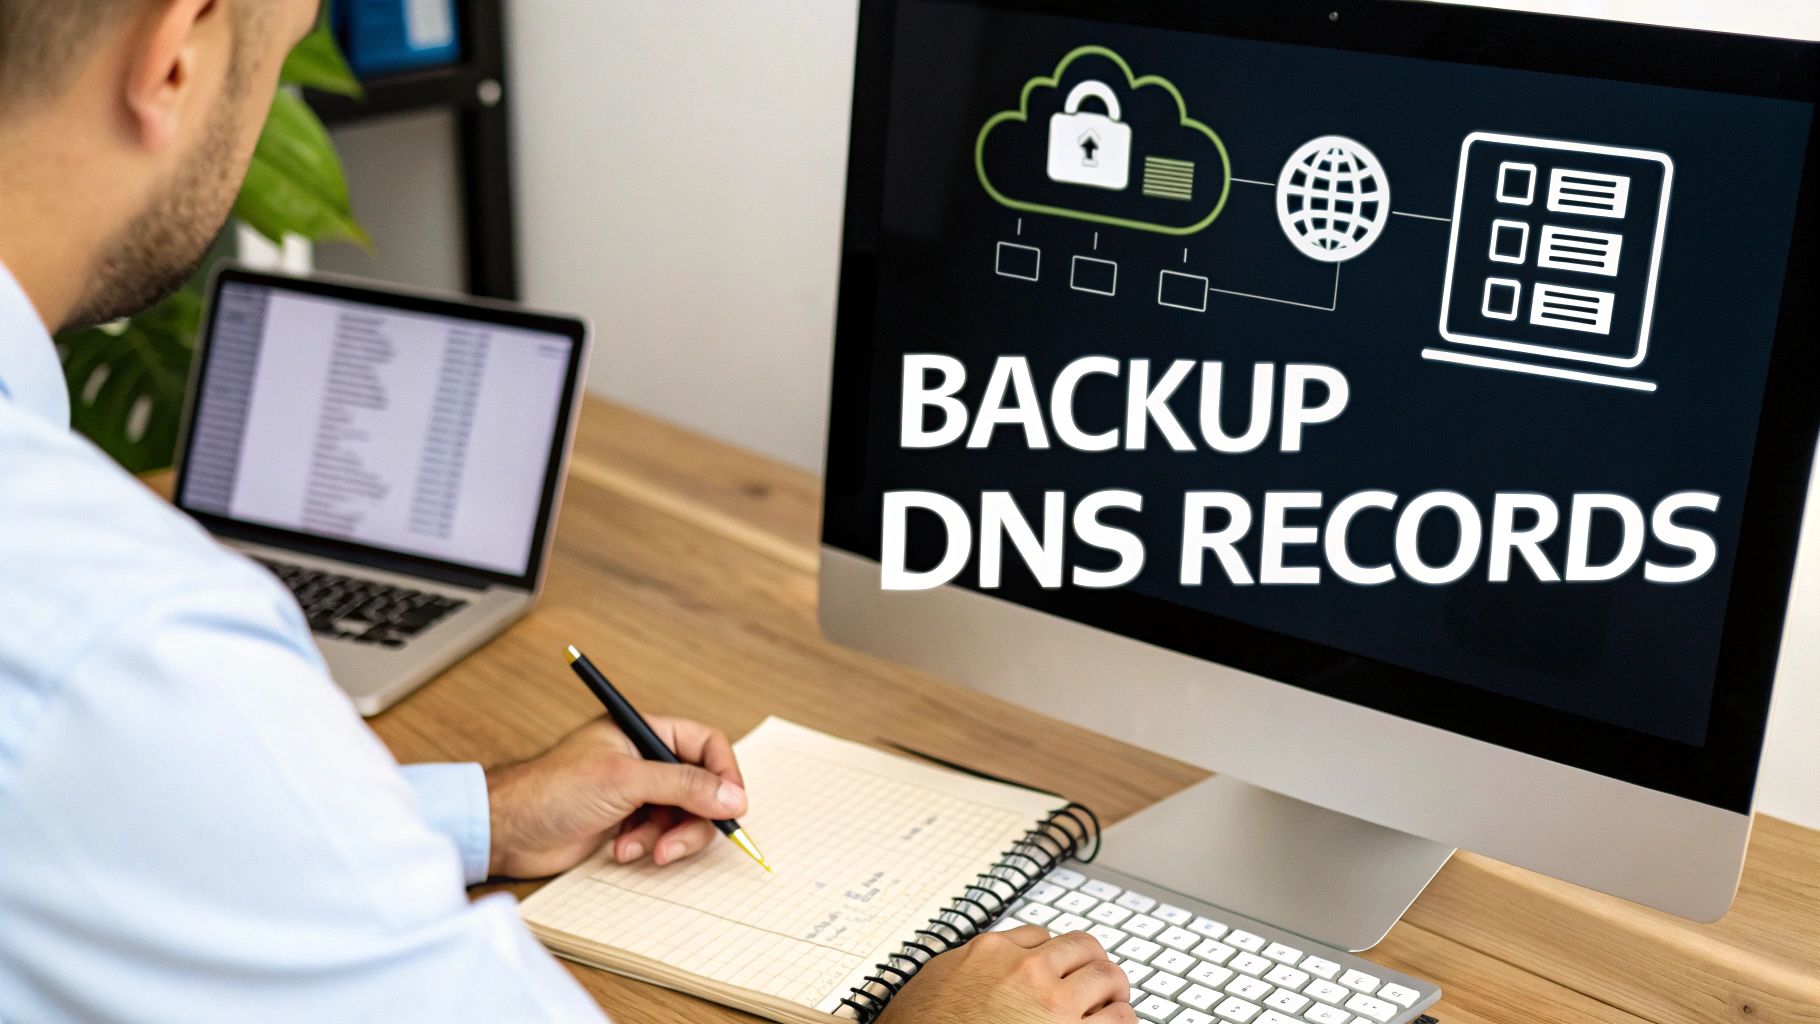
Create Your DNS Blueprint Before You Start
The best strategy for a seamless transition is to create a blueprint of your current DNS records before you even click "start transfer." Just log into your current registrar, find the "DNS Management" or "Zone Editor" section, and take a screenshot or copy down every single record.
This simple act turns a stressful technical task into a straightforward copy-paste job later on. Once the transfer is complete, all you have to do is replicate this exact setup at your new registrar. No guesswork, no panic, and most importantly, no downtime.
Understanding this is especially important in the UK, where the domain landscape is incredibly active. The .uk extension is a vital asset for British businesses, and as of January 2025, there were over 1.2 million second-level .uk domains and nearly 9 million third-level domains managed. This bustling activity, with .co.uk leading the pack at over 8.4 million registrations, shows that domain transfers are a constant, necessary activity. You can see the latest UK domain registry statistics from Nominet.
Key DNS Records to Document
You'll probably see a lot of different records, but for most small businesses, these are the ones that matter most for preventing downtime. Let’s make this easy.
Before you begin, grab a notepad (digital or physical) and jot down your settings using this table as a guide. It will be your best friend when you're setting things up at the new registrar.
DNS Record Checklist Before You Transfer
DNS Record Type | What It Does | Example Value | My Current Value |
|---|---|---|---|
A Record | The big one. Points your domain to your website's server IP address. | ||
CNAME Record | A nickname. Often points to your main domain so both addresses work. | ||
MX Record | Mission-critical for email. Tells servers where to deliver your mail. You may have more than one. | ||
TXT Record | Used for verifying ownership (like for Google Workspace) and email authentication (SPF, DKIM) to fight spam. |
Filling this out takes five minutes but saves hours of potential headaches. Once the transfer is done, you’ll just copy your notes into the new registrar’s DNS panel, and everything will work exactly as it did before.
Pro Tip: When you're ready to update your DNS at the new registrar, pay close attention to the TTL (Time To Live) settings. This value, usually in seconds, tells servers how long to cache the information. Lowering it before a planned change can help updates spread across the internet much faster.
By documenting these records, you create an insurance policy for your online operations. And remember, moving to a new registrar is a good time to double-check your site's security, so it’s a great opportunity to review how to properly manage SSL certificates.
If mapping out DNS records feels a bit too technical or you simply want an expert to guarantee a flawless switch, our team is here to help. At Baslon Digital, we handle domain transfers and website management every day. Reach out to us for a stress-free experience from start to finish.
Troubleshooting Common Domain Transfer Issues
Even when you follow every step to the letter, a domain transfer can occasionally hit a snag. The good news is that most issues are common and completely fixable. This isn't the time to panic; it's time to play detective, figure out what's gone wrong, and get things moving again.
Think of this as your field guide to the little bumps in the road. Most of the time, the solution is just a few clicks away, and you'll be back on track without needing a lengthy support call.
The Dreaded 'EPP Code Invalid' Error
This is easily the most common hiccup. You've carefully copied your authorisation code, pasted it into your new registrar's system, and...bam. You're promptly told it's wrong. Frustrating, right?
Don't worry, the fix is usually very simple. The problem almost always falls into one of these buckets:
A Simple Typo: It’s incredibly easy to miss a character or accidentally add an extra space at the end when copying the code. Go on, try copying and pasting it one more time.
A Stale Code: Some registrars automatically generate a new EPP code every time you view it, making the old one useless. That code you copied yesterday might not work today.
The Wrong Code: It happens to the best of us. If you have multiple domains, you might have just grabbed the code for the wrong one.
The solution is the same for all three: log back into your old registrar, find your domain management panel, and request a brand-new EPP code. Use this fresh one to restart the process.
My Transfer Is Stuck and Going Nowhere
You've kicked off the transfer, you’re sure you did everything right, but days have passed, and the status is still "pending." This frustrating limbo is nearly always caused by one thing: a missed email.
The process hinges on you approving an email sent to your domain's administrative contact. If you don't click that approval link, the old registrar simply lets the standard 5-7 day period run out before releasing the domain automatically.
Your Immediate Action Plan: Dive into your email inbox—and especially your spam folder—for that administrative address. Search for emails from your old registrar with terms like "transfer approval" or your domain name. Finding and clicking that link is the fastest way to get your transfer moving again.
Handling the Unique .uk Domain Transfer Process
If you’re transferring a , , or any other domain, you can forget about EPP codes entirely. The UK registry, Nominet, uses a different, much simpler system built around an IPSTAG.
An IPSTAG is just a unique identifier for each UK registrar. To transfer a domain, the process is a little different:
Ask your new registrar what their IPSTAG is. It'll be a short tag, often their company name in all caps (e.g., ).
Log in to your old registrar's control panel.
Find the setting to change your domain's IPSTAG and update it to the new one.
That's it. This change usually happens within a few hours, making transfers some of the quickest around. This streamlined process is essential for the many organisations moving their digital homes. For instance, the migration towards trusted domains is a major trend, as seen with the huge increase in public sector moves to . In 2024 alone, a record-breaking 1,295 parish councils moved to domains, a 566% increase from the previous year, highlighting how important the right domain extension is for building trust. You can read more about the public sector's digital shift on nalc.gov.uk.
Navigating these small hurdles is often the final step in your journey. If you've tried these solutions and are still stuck, or if you'd simply prefer an expert to handle the entire process flawlessly, we're here to help. The team at Baslon Digital can manage your transfer seamlessly, ensuring zero downtime. Get in touch with us today for a stress-free experience.
Finalizing Your Transfer and Next Steps
Congratulations, the transfer is complete! Your domain now has a new home at your chosen registrar. It’s a great feeling to have the process behind you, but before you pop the cork, there are a few essential final checks to run through.
These last steps are all about ensuring a seamless transition. We need to make absolutely certain your website and email are working perfectly, and also figure out when a situation might be complex enough to call in a professional.
Your Immediate Post-Transfer Checklist
Once you get that final "Transfer Complete" email, it's time for a quick but crucial audit. This is your chance to verify everything has been set up correctly at the new registrar, ensuring it’s business as usual for your visitors and customers.
Your first stop should be the DNS management panel at your new provider.
Confirm Your DNS Records: Remember that DNS blueprint you saved earlier? Now's the time to pull it out. Meticulously compare your documented A, CNAME, MX, and TXT records against what's now configured in your new account. If there are any discrepancies, update them immediately to match your original settings.
Point Your Nameservers (If Needed): If you were using a third-party DNS service (like Cloudflare), or if you’ve replicated your old settings perfectly, you can now update your nameservers to point to your new registrar. This officially hands DNS control over to them.
Enable Domain Lock and Auto-Renew: Security first. Find the "Registrar Lock" or "Transfer Lock" setting and switch it back on. You should also enable the "Auto-Renew" feature to prevent any accidental expiry down the line. A lapsed domain can be a nightmare to recover.
Test Everything Works as Expected
With your settings confirmed, it’s time to perform a real-world test. Don't just assume everything is working; actively check it.
Website Test: Open a new browser window (or an incognito/private one to avoid caching issues) and type in your domain name. Does your website load correctly? Click through a few pages to be certain.
Email Test: Send a test email from an external account (like a personal Gmail) to your business email address. Did you receive it? Now, reply to that email. Did the external account receive your reply? This confirms both incoming (MX records) and outgoing mail is flowing correctly.
Key Takeaway: A transfer isn't truly finished until you've personally verified that your website and email services are fully operational. This simple five-minute check can save you from discovering a problem hours or even days later.
Knowing When to Call a Professional
While the steps in this guide cover the vast majority of domain transfers, some situations add layers of complexity that can make a DIY approach risky. For many, the cost of getting it wrong—in terms of downtime or lost emails—is far greater than the cost of hiring an expert. For a deeper dive into what you can expect, you might be interested in our guide to understanding domain name costs for your website.
You should strongly consider hiring a professional if you find yourself in any of these scenarios:
Large Domain Portfolios: Managing the transfer of dozens or hundreds of domains at once is a logistical nightmare. A professional can automate and track the process to ensure none are left behind.
Complex DNS Setups: If your DNS zone file looks less like a simple list and more like a complex web of subdomains, custom TXT records for multiple third-party services, and intricate mail routing, an expert is essential to prevent breaking a critical business function.
Non-Responsive Registrars: Dealing with an unhelpful or slow-to-respond registrar can be incredibly frustrating. A professional often has established contacts and knows how to escalate issues to get them resolved faster.
You're Simply Overwhelmed: There's no shame in admitting that this is outside your comfort zone. Your time is best spent running your business, not troubleshooting technical issues.
Transferring a domain name is a manageable process, but a successful outcome lies in careful preparation and diligent follow-up. By performing these final checks, you can confidently close this chapter and focus on what's next for your business.
If the idea of managing DNS records and coordinating with registrars feels daunting, let the experts at Baslon Digital handle it for you. We provide seamless domain transfer and website management services, ensuring zero downtime and complete peace of mind. Contact us today to ensure your domain is in safe hands.
Comments