E Commerce Photography That Sells
- Baslon Digital
- Nov 22, 2025
- 18 min read
Updated: Nov 24, 2025
When you're selling online, your product photos aren't just pictures—they're your entire sales pitch. Since customers can't physically pick up, touch, or inspect your items, your e-commerce photography has to do all the heavy lifting. It's the single most important asset you have, directly shaping how people see your brand, whether they trust you, and ultimately, if they click "buy now." So it's vital that you ensure your E Commerce website features photography that sells.
Why High-Quality Product Photos Actually Matter
In a sea of online shops, your photos are the first handshake you have with a potential customer. That visual first impression needs to be firm, confident, and convincing.
Blurry, poorly lit, or inconsistent images scream amateur and can make shoppers hesitate.
Let's face it, if you can't be bothered to present your product well, why should they trust the quality of the product itself?
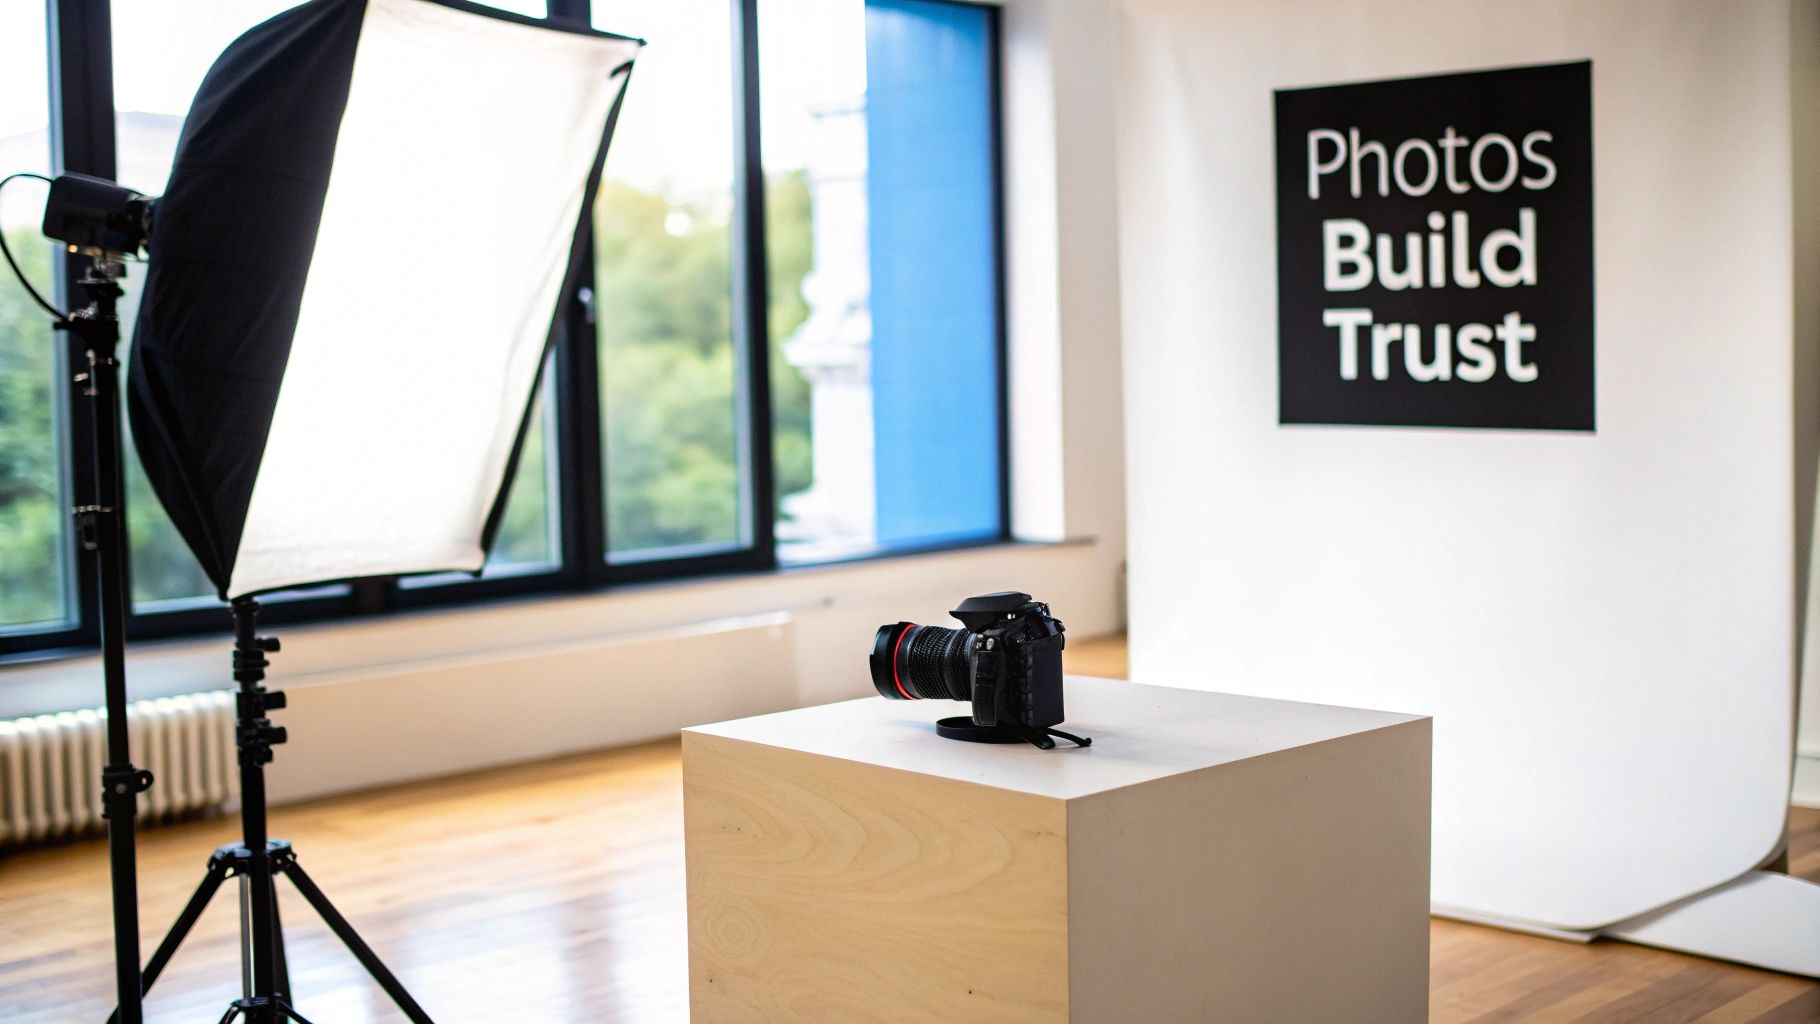
Building Immediate Customer Trust with E Commerce Photography That Sells
Great photography closes the gap between the screen and reality. When someone sees crisp, clear, and detailed images, it instantly builds a sense of trust and credibility. They feel much more confident that what they're seeing is what they’re actually going to get.
This is absolutely crucial for overcoming the natural hesitation that comes with online shopping. Think about it: detailed shots showing the fine stitching on a handbag or the true texture of a wooden table tell a story of quality that words alone just can't.
Boosting Conversions and Slashing Returns
The impact of strong imagery on your bank balance is massive. High-quality photos help customers make confident, informed decisions. This not only makes them more likely to buy but also drastically cuts down on returns. When a buyer has a crystal-clear idea of the product's size, colour, and features, there are far fewer nasty surprises when the parcel arrives.
The UK's e-commerce market has exploded, growing from a mere £1.8 billion in 2000 to a projected £688.4 billion by 2025. In this fiercely competitive space, professional images are non-negotiable. Some studies even show they can boost conversion rates by up to 250%. You can dig into more UK e-commerce statistics to see just how fast things are moving.
Think of your product photos as your silent salesperson. They work 24/7, showing off your product's best features, visually answering customer questions, and sealing the deal.
Creating a Powerful Brand Story


Beyond just showing what an item looks like, e-commerce photography is a brilliant tool for telling your brand's story. The style you choose—whether it's clean and minimalist or rich and atmospheric—shouts your brand's personality from the rooftops.
Consistent, high-quality visuals across your website and social media forge a cohesive and memorable brand identity that helps you stand out. This visual language connects with your ideal audience on a much deeper, emotional level, helping to turn casual browsers into loyal fans.
Ready to give your product listings a serious upgrade with photos that sell? Let's dive into how you can put together the perfect photography kit without needing a second mortgage.
Building Your Photography Kit That Works
Getting started with e-commerce photography doesn't mean you need to remortgage your house for the latest gear. Honestly, the secret is knowing where to put your money for the biggest impact. You can get stunning, professional-looking results with a surprisingly modest setup if you just focus on the right things.
Your journey into great product photos can start with the powerful camera you already own—your smartphone. Modern phones pack incredible imaging tech, but their biggest weakness is shakiness. This is where your first non-negotiable piece of kit comes in.
Camera: Your Foundation
It's a common myth that you need a high-end DSLR or mirrorless camera right out of the gate. While they offer more manual control, an unstable smartphone shot will always look worse than a steady one. That’s why a tripod is the most important first purchase for anyone serious about e-commerce photography.
Smartphones: Perfect for beginners. Just grab a simple smartphone tripod mount to kill the camera shake. This ensures your images are consistently sharp and well-composed every single time.
DSLR/Mirrorless Cameras: A worthy upgrade when you're ready for more creative control. These cameras let you swap lenses and manually tweak settings like aperture and ISO to achieve specific looks, like that lovely blurred background effect.
Simply put, a tripod gives you the stability you need for crisp, professional shots, no matter what camera you're using.
A steady camera is the bedrock of good product photography. It lets you use slower shutter speeds in lower light without getting blurry shots, ensuring every last detail of your product is captured with absolute clarity.
Lighting: The Game Changer
If the camera is your foundation, lighting is the entire house built on top of it. Poor lighting is the number one reason product photos fail. It can make even the most premium products look cheap and undesirable. The good news? Great lighting doesn't have to be expensive.
You have two main options to play with, each with its own perks.
Natural Light: The Free Option

Using the sun is a fantastic, budget-friendly way to start.
Find a Large Window: Set up a table next to a window that gets plenty of light, but not harsh, direct sunlight. An overcast day is your best friend here, as the clouds act like a giant, natural softbox, creating soft, even light.
Use a Reflector: Grab a simple piece of white foam core or even just some card and place it on the side of your product opposite the window. This will bounce light back, filling in any harsh shadows and bringing out the details.
This simple setup costs next to nothing and can produce beautifully soft, professional-looking images. The only real downside is that you're at the mercy of the weather and the time of day.
Artificial Light: The Consistent Choice

For total consistency and control, an affordable artificial lighting kit is a brilliant investment. You can shoot whenever you want—day or night, rain or shine.
Softbox Kits: A basic two-light softbox kit is an excellent starting point. Use one light as your main (key light) and the other to soften shadows (fill light). This setup gives you complete control over the look and feel of your images.
LED Panels: These are another great option. They often let you adjust both brightness and colour temperature, giving you incredibly precise control over your lighting.
To get going, you might consider investing in the best photography starter kit for beginners, which often bundles all the essential equipment together.
To help you decide where to start, here’s a quick breakdown of your options based on budget.
E-commerce Photography Equipment Options by Budget
Equipment | Beginner Budget (Under £100) | Intermediate Setup (£100-£500) | Advanced Kit (£500+) |
|---|---|---|---|
Camera | Smartphone (the one you already own) | Entry-level DSLR or Mirrorless Camera | Pro-grade DSLR or Mirrorless Camera |
Lens | Built-in smartphone lens | Kit lens (e.g., 18-55mm) or a 50mm "nifty fifty" prime lens | Macro lens for details; multiple prime lenses |
Tripod | Basic smartphone tripod with mount | Sturdy, adjustable tripod with a fluid head | Heavy-duty tripod (e.g., Manfrotto, Gitzo) |
Lighting | Natural light from a window + a foam core reflector | Two-light softbox kit or a pair of LED panels | Three-point lighting kit (key, fill, backlight) with modifiers |
Backdrop | Large white poster board or fabric | Seamless paper roll (white, grey) with a stand | A variety of seamless paper rolls, vinyl backdrops, or a cyclorama wall |
This table shows you don't need to break the bank to get started. Focus on mastering the basics with a beginner kit, and you can always upgrade individual pieces as your skills and business grow.
Backdrops: Creating a Clean Canvas
Your background should make your product the hero, not steal the spotlight. A clean, simple backdrop is absolutely essential for creating a professional and cohesive look across your online shop.
For that classic, marketplace-friendly look, a white seamless paper roll or even a simple sweep of white poster board is perfect. It creates a clean, 'infinite' background that makes products pop and seriously simplifies the editing process. It’s the go-to approach for major retailers for a reason—it’s all about clarity and focus.
The demand for high-quality visual content is booming. In the UK, the Photographic Activities industry, which serves countless e-commerce businesses, now includes over 8,100 businesses with revenues hitting around £1.9 billion in 2025. This just shows how vital strong product images have become for any online retail success.
With a basic kit in place—a steady camera, good lighting, and a clean backdrop—you're well on your way to creating e-commerce photography that not only looks professional but actually drives sales.
Getting Your Lighting and Backgrounds Spot On
Once you've got your kit sorted, the real fun begins. Lighting isn’t just some technical thing you have to deal with; it’s the single most powerful tool you have for setting a mood, showing off texture, and making your products look so good people can't resist them. In the same way, your background can either make your product the star of the show or a forgotten extra.
The whole process of building your kit, from figuring out your budget to picking your camera and lights, is a deliberate one. Think of it like this:
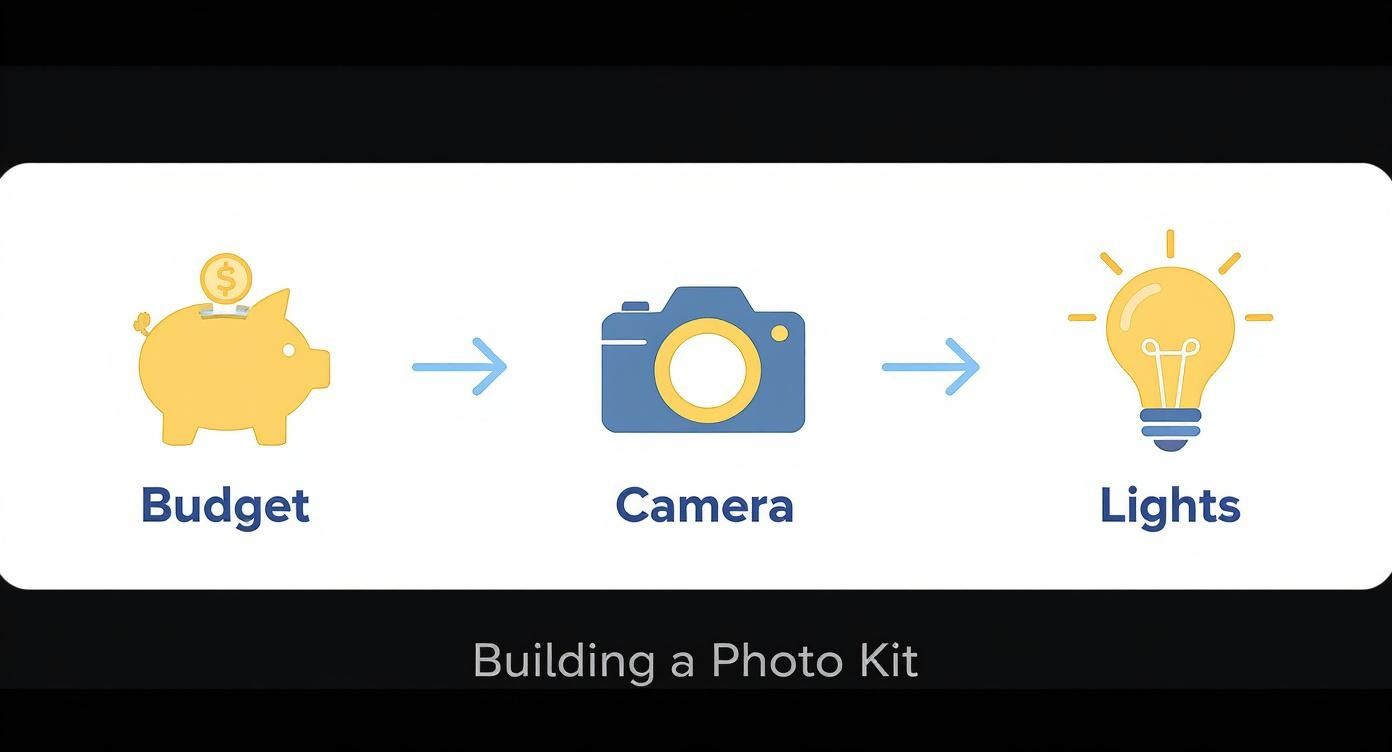
This just hammers home that a great setup doesn't happen by accident. You start with what you can spend and make smart choices from there.
Making the Most of Natural Light
If you’re just starting out, natural light is your best friend. It’s free, it’s everywhere, and it creates a soft, flattering look that’s genuinely hard to get right with artificial lights until you’ve had a lot of practice. What you’re looking for is diffused light, not that harsh, direct sunlight that creates ugly shadows.
An overcast day is honestly perfect. The clouds act like a massive softbox, scattering the light beautifully and evenly. If it’s a bright sunny day, just set up your product near a window that isn't getting blasted by the sun. You can soften the light even more by hanging a thin white sheet over the window.
To get control of the shadows, grab a simple white reflector—a piece of foam board or even a sturdy bit of white card does the job brilliantly. Place it opposite your light source (the window) to bounce light back onto the shadowed side of your product. This one little trick adds a professional-looking dimension and makes sure no detail gets lost in the dark.
Creating a Simple Artificial Lighting Setup
When you need to shoot at any time of day and want every photo to look the same, an artificial lighting setup is the only way to go. A basic two-light kit is incredibly versatile and gives you a massive amount of control over the final picture.
Here’s a simple way to think about your lights:
Key Light: This is your main, brightest light source. Pop it at a 45-degree angle to your product. This is what creates the highlights and gives the item its shape.
Fill Light: This is your second, less powerful light (or you can just place it further away). Position it on the opposite side of the key light. Its job is just to ‘fill in’ and soften the shadows from the key light, which brings out more detail.
This classic two-point setup is a cornerstone of product photography for a reason. It ensures your product is lit evenly, looks three-dimensional, and doesn't have any of those distracting, harsh shadows that can make an item look cheap.
Your lighting setup says a lot about your product quality before anyone even reads a word. Soft, even lighting suggests a premium, well-made item. Harsh, messy shadows? That can scream low quality.
Choosing the Right Background
The background is literally the stage for your product. Whether you go for a stark, clean background or a more lively, contextual scene really depends on your brand and where the photo is going to be used.
The Classic White Sweep
For most online marketplaces like Amazon and for your main product shots on your own website, a pure white background is the industry standard. It gets rid of all distractions and makes the product the undeniable hero of the shot.
A white seamless paper roll is what the pros use, but you can get a very similar effect by curving a large piece of white poster board up behind your product and underneath it. This creates a seamless "sweep" with no distracting horizon line, focusing all the attention right where you want it. It also makes editing, especially if you need to remove the background, a whole lot easier.
Compelling Lifestyle Backgrounds
While white backgrounds are essential for clarity, lifestyle shots are what tell a story and create an emotional connection. These are the images that show your product in its natural habitat, helping customers picture it in their own lives.

A ceramic mug looks so much more appealing on a rustic wooden table next to a book.
A pair of hiking boots instantly gains street cred when they’re photographed on a mossy rock.
A sleek laptop looks far more desirable sitting on a clean, modern desk.
The trick is to use props and settings that complement the product without stealing the spotlight. The background should add context and aspiration, not clutter. A good mix of clean e-commerce shots and editorial-style lifestyle images gives customers both the information they need and the inspiration they need to click "buy".
Now that your lighting and background are sorted, you have the perfect stage to style and shoot your products. If you need a hand turning these amazing images into a high-performing website, the team at Baslon Digital specialises in creating stunning Wix sites that make your products shine.
How to Style and Shoot Your Products

Alright, your lights are set up and your background is looking sharp. Now for the fun part—the bit where you actually bring your products to life. This is where you stop simply showing an item and start telling a story that makes a customer feel like they’re already holding it.
Great styling and a solid shooting plan are what separate a forgettable product page from one that practically screams "add to basket." It's all about building a visual narrative that answers your customer's questions before they even think to ask them.
Nail Down Your Essential Shot List
To give your customers that final nudge of confidence they need to buy, you have to show your product from every conceivable angle. A proper shot list is your best friend here, ensuring you don't miss a thing and leave no room for doubt.
You're aiming for a collection of photos that, together, paint the complete picture.
The Hero Shot: This is your showstopper, the main event. It should be a crisp, perfectly lit photo of the product by itself on a clean background, showing the whole thing in all its glory.
Detailed Close-Ups: Get right in there and show off the quality. Focus on textures, stitching, unique materials, or any little details that make your product special. These shots just scream craftsmanship.
In-Context Lifestyle Photos: Show the product being used. A handbag on someone's shoulder, a coffee mug on a desk, a print on a wall—these help customers visualise it in their own lives.
Scale Shots: These are absolutely vital for managing expectations and cutting down on returns. Just place your product next to a familiar object (like a coin or a smartphone) to give an instant sense of its true size.
Master the Art of Product Styling
Styling is all about adding a bit of personality and context without creating a cluttered mess. The goal is simple: make your product look its absolute best and help it connect with your ideal customer. Your styling choices should always be the supporting act, never stealing the spotlight.
"A common mistake in e-commerce photography is over-styling. The props should be a supporting actor, not the lead. If a prop doesn't add to the product's story or clarify its use, it's just a distraction."
Keep it simple but effective. For instance, a small sprig of lavender next to a bar of soap instantly suggests its scent. A pair of smart glasses beside an open notebook can give it a professional, organised feel. The trick is to pick props that feel authentic to your brand and the product’s purpose.

Create a Workflow for Consistent Photos
Consistency across your product images is non-negotiable for a professional-looking online shop. A jumbled mix of photos with different lighting, angles, and styles can make your brand feel disjointed and, frankly, a bit amateur. The fix? A simple, repeatable workflow.
Set Up and Mark Your Space: Seriously, get some masking tape. Mark out exactly where your tripod, lights, and product should be. This little trick ensures every single hero shot is framed identically.
Document Your Settings: Jot down your camera's settings (aperture, ISO, shutter speed) and where you placed your lights. Think of it as a "recipe" that lets you perfectly replicate your setup for future shoots.
Shoot in Batches: If you can, photograph all your products in one go. This helps maintain consistent lighting and makes the whole process way more efficient. Get all the shots from your list for one product before you even think about moving on to the next one.
This systematic approach will save you a ridiculous amount of time and guarantees your entire catalogue has that cohesive, professional look that builds brand trust. If you happen to be working with unique or vintage items, a specialised resource can be a goldmine; this guide to photographing antiques has some fantastic tips.
The data backs this up, too. One recent survey found that 95.6% of fashion brands use model photography, and on average, they show eight images per product. What's more, 76.1% of top brands use a mix of flat-lay, ghost mannequin, and lifestyle shots, proving that variety is key to winning over UK shoppers.
Ultimately, your photos need to sing in harmony with your words. A brilliant image grabs attention, but a well-written product description is what seals the deal. Make sure to check out our guide on how to write product descriptions effectively to ensure your words are just as powerful as your pictures.
Polishing and Optimizing Your Images for the Web
Snapping a great photo is just the beginning. The real magic—the bit that turns a good product shot into a sales machine—happens in the editing suite. This is where you polish, perfect, and prime your images to load at lightning speed and look incredible on your online store.
Post-processing isn’t about faking it or misrepresenting your product. It’s about enhancement. Simple tweaks can fix minor issues from the shoot and create a cohesive, professional look that screams "trustworthy brand."
Your Go-To Editing Workflow
Consistency is everything. When a customer browses your products, you want them to see a uniform collection where every item feels like it belongs. This builds confidence and makes for a much smoother, more pleasant shopping trip.
And you don't need to splash out on expensive software to get it right. Plenty of free tools have all the power you need to make your product photos shine.
Your Core Editing Checklist:
Crop & Straighten: First things first, get the framing perfect. Chop out any distracting background bits and fix any slightly wonky horizons. It’s all about creating a clean, balanced look.
Fix the White Balance: Take a look at the whites in your photo. Are they actually white? If the shot looks a bit too blue (cool) or yellow (warm), a quick white balance adjustment will bring back its natural, true-to-life colours.
Tweak Exposure & Contrast: Want your products to pop? A little bump in exposure will brighten things up, while a touch of contrast will make the details stand out. Just be subtle—the goal is clarity, not drama.
Get the Colour Right: This is non-negotiable. The colour of your product on-screen must be an exact match to the real thing. Getting this right is one of the single best ways to cut down on returns from customers who got a shade they weren't expecting.
Sharpen Up: As the very last step, apply a small amount of sharpening. This gives details like fabric textures or fine engravings that crisp, clear finish.
Here’s a massive time-saver: batch editing. Once you’ve nailed the look on one image, save those settings as a preset. You can then apply that same preset to all the other photos from that session, guaranteeing total consistency with almost zero extra effort.
Optimising Images for Speed and SEO
Once your images are looking sharp, the next job is optimising them for the web. This is absolutely critical. Huge, uncompressed image files are one of the biggest reasons websites load slowly, and a slow site will have potential customers clicking away in frustration.
Proper optimisation means striking the perfect balance between image quality and file size. It also involves giving search engines the right clues so they understand what your images are all about. You can take a deeper dive into this by checking out our other articles on how image optimization affects speed.
Choosing the Right File Type
The format you save your image in matters. It has a huge impact on both quality and file size. For e-commerce, you’ll mostly be dealing with two main players.
JPEG (or JPG): The undisputed champion of web images for years. JPEGs offer fantastic compression, letting you shrink file sizes way down without a noticeable drop in quality. It’s the go-to for most product photos.
WebP: A newer format from Google that’s even better at compression than JPEG. That means even smaller file sizes at the same quality level. Platforms like Wix fully support WebP now, making it an excellent choice for speeding up your site.
Naming Files and Writing Alt Text
Come up with a simple, descriptive naming system that includes your brand and the product.
A good file name formula: brand-product-name-key-details.jpg For example: sunnyco-ceramic-coffee-mug-12oz-blue.jpg
Just as important is the alt text (or alternative text). This is what shows up if an image can't load, and it's what screen readers use to describe the image to visually impaired users. It's also a major clue for search engines.
Your alt text should be a short, accurate description of what's in the picture. Just imagine you’re describing the product to someone over the phone.
A great alt text example: "White ceramic coffee mug with a curved handle sitting on a wooden table."
Follow these editing and optimisation steps, and you'll have product photos that not only look fantastic but also help create a faster, more accessible, and SEO-friendly online shop.
Ready to put those perfectly polished photos to work on a stunning, high-performing website? Contact Baslon Digital today, and let's build a Wix site that turns your beautiful images into sales.
Your E-commerce Photography Questions Answered
Even when you think you’ve got it all figured out, questions pop up. It’s totally normal, especially when you’re trying to get your product photos looking just right. Let’s tackle some of the most common queries we hear from online sellers to clear things up and get you shooting with confidence.
Can I Really Get Professional Results Using Just My Smartphone?
Absolutely. You’d be amazed at what modern smartphone cameras can do. The secret isn’t in owning a ridiculously expensive camera; it’s all about how you control the lighting, compose your shot, and handle the editing.
Grab a tripod for stability (no one likes a blurry photo), learn to master natural light with a cheap reflector, and stick to a clean, simple background. Do that, and you're already 90% of the way there. A few tweaks in a post-processing app for colour correction and cropping will finish the job. A well-lit smartphone photo will beat a poorly lit shot from a fancy DSLR every single time.
How Many Photos Should I Include for Each Product?
There isn’t a single magic number, but all the data points to one thing: more is better. A good sweet spot to aim for is 5-8 high-quality images per product.
This gives you enough room to show the item from every angle, maybe a lifestyle shot of it being used, a close-up detail shot to show off the texture, and a scale shot to give people a real sense of its size. Showing this kind of variety builds trust and answers questions before a customer even has to ask, which is a massive win for reducing returns and boosting sales. Just remember to double-check the image guidelines for the specific platforms you’re selling on—they sometimes have their own rules.
What Is the Most Common Mistake to Avoid?
If there’s one thing that can sink an otherwise great product shot, it’s bad lighting. It’s the biggest and most common pitfall, hands down.
The most common and damaging mistake is poor lighting. Harsh shadows, inconsistent colour temperature (e.g., photos looking too blue or yellow), and underexposure can make even the best products look cheap and unprofessional.
Harsh, distracting shadows, colours that look ‘off’ because of the wrong light temperature, and dark, gloomy images can ruin everything. This one factor can make a premium product look cheap and nasty. Your number one job is to create soft, even, flattering light. It’s the foundation for everything else and the one thing you absolutely have to get right.
What Are the Best Image Dimensions for a Wix Website?
For Wix, your best bet is to upload high-resolution images and let the platform’s built-in magic handle the heavy lifting of optimising for different screens. A solid rule of thumb is to upload images that are at least 2560 pixels on the longest side.
This ensures they look sharp and professional on all devices, from a massive desktop monitor right down to a phone. Speaking of which, a 1:1 (square) or 4:5 (vertical) aspect ratio tends to work beautifully in product galleries, especially for mobile shoppers—which is likely a huge chunk of your audience.
Always save your images as JPEGs to get the best balance of quality and file size, and don't skip using Wix's image compression tools. A slow-loading website is a guaranteed way to lose a sale, so that final step is crucial.
Getting your photography right is a massive step, but it's only part of the puzzle. A stunning website is what turns those beautiful images into actual sales.
Contact Baslon Digital today to create a custom Wix site that showcases your products perfectly.
It’s Time to Create Photos That Actually Convert
You've made it through the whole playbook. From building a smart, budget-friendly kit to wrestling with light and optimising your final images, you now have a solid framework for creating product photos that don't just look good—they sell.
The theory is sorted; now it's time to get your hands dirty. Don't wait until you've got a dozen products ready. Just pick one. Apply these techniques and see for yourself what a difference a professional-looking photo makes. That's where the real learning kicks in.
From Browsers to Buyers
Every single thing we've talked about, from the perfect hero shot right down to the humble alt text, is all pushing towards one simple goal: turning someone casually browsing into a confident buyer. High-quality, consistent, and well-optimised images build the trust you need to get that "add to basket" click.
Think of your photography as a cornerstone of your sales funnel. When it's done right, it answers questions before they're asked, shows off the quality you're so proud of, and creates a sense of desire. For anyone looking to sharpen their entire sales process, our guide on e-commerce conversion rate optimisation is the perfect next step.
Remember, in e-commerce, your photos are your silent salesperson. They're on the clock 24/7, showing off your product's best features and building brand credibility, closing the sale when you can't be there in person.
Getting a grip on these skills gives you complete control over how your brand is seen. It lets you present your products with the care and quality they deserve, carving out a professional online space that stands out in a seriously crowded market.
Ready to match your stunning new product photos with a website that pulls its weight? The team at Baslon Digital specialises in creating beautiful, high-converting Wix websites that make your products look irresistible. Visit us at https://www.baslondigital.com to get started.